Thursday, January 31, 2013
Monday, January 28, 2013
Heater works and Ready for Final Inspection
I installed the heater vent control and heater variable control and the moment of truth was upon me. The PWM (Pulse Width Modulated) control worked flawlessly - even better than I expected. The PWM system gets power from the blower 12V so the heater cannot operate unless the blower is going. I also have a microswitch on the vent flap so if it's nearly closed the heater cannot operate.
Sliding the control up about halfway shows about 2 Amps being drawn - about 1200 Watts. Moving the control further to the left (hotter) show the current going up to 5 Amps for a second then dropping back to 2.5 Amps. That's the self limiting ceramic heater core doing its thing. A great success.
 The dashboard controls are also labelled.
We were on holiday last week and the family knew I had a list of things to do before being ready for final inspection - with times allocated to each entry (10 hours in all). It's been entertaining gradually crossing off each item until we came down to zero hours.
I reckon the Vogue is ready for final inspection by the engineer.
Sliding the control up about halfway shows about 2 Amps being drawn - about 1200 Watts. Moving the control further to the left (hotter) show the current going up to 5 Amps for a second then dropping back to 2.5 Amps. That's the self limiting ceramic heater core doing its thing. A great success.

We were on holiday last week and the family knew I had a list of things to do before being ready for final inspection - with times allocated to each entry (10 hours in all). It's been entertaining gradually crossing off each item until we came down to zero hours.
I reckon the Vogue is ready for final inspection by the engineer.
Boot (Trunk) Covers and signs.
The boot covers and warning signs installed. The inertia cut-out switch is now also installed and wired in, as is the mains inlet plug. The inertia switch is mounted on the Vogue bodywork just behind the fuel tank cover (the black cover on the left). It's a bit difficult to actually see the polycarbonate panel in front of the four battery packs - the warning sign just kind of hangs in the air.
 A view from the passenger side. There is plenty of room for shopping bags. The usable area of the boot hasn't really changed. The elevated section where the batteries are now was never much use.


Sunvisors - the complete story
Picking up where the last post left off.
Here is the invisible zip that we used in the sunvisors. This is actually a dress zip purchased from Lincraft. Laurel figured it only had to be done up once, so it was better to use an invisible zip rather than a heavy upholstery zip which would have been highly visible.

After cutting out the fabric for the sunvisors, we installed the zip along the pivot edge (closer to the windscreen) and down the side. This meant that the remainder of the sunvisor fabric could be sewn and then the zipper opening was used to insert the visor.

Laurel used double sided basting tape to temporarily hold the zipper to the fabric and to hold the seams together before sewing. (More on this at the end of this post.)
After inserting the zip the two pieces of fabric were sewn together along their remaining sides leaving an opening for the post to be inserted.
To get the cover to sit flat around the edges, it's important to clip all the convex curves by cutting a number of small 'V's from the seam and the one concave curve just needs to be snipped in a few places. That way the fabric doesn't bunch up on the curves when it's turned inside-out and the concave curve is smooth.
 Next the cover is inserted, ensuring that the seams are spread evenly and the zip is closed.
The finished and installed sunvisors. It was quite traumatic cutting the holes in the headlining for the spring part of the sunvisor post to poke through.

...and folded down.

From Laurel:
A note on what was important when sewing this upholstery:
All the upholstery was sewn on my domestic Bernina Aurora 430. When I bought it, everyone told me that a "walking foot" was essential for the job. I had never used one and didn't think it was necessary, but they were right. A walking foot effectively lifts the foot off the fabric between stitches so the top fabric does not move in relation to the bottom fabric while you sew.
The other thing which I only discovered recently (in time for sewing the sunvisors) is double-sided basting tape. This would have made the rest of the upholstery in the car soooo much easier.
 Even though I hand tacked all the upholstery pieces together before sewing (which took a lot of time - all those silver pieces on each seat), they still tended to move when you sew. With the basting tape (1/8 th inch wide), you just run a narrow strip down the seam allowance and peel off the paper backing.

Then stick the other piece of fabric to it. Hey presto, they don't move a bit. When you're finished, you just pull the seam allowances apart and pull off the tape. It's truly the most fantastic sewing notion I've ever found. It costs $1.95 for 200 inches and is available in Australia from "Punch With Judy".
Here is the invisible zip that we used in the sunvisors. This is actually a dress zip purchased from Lincraft. Laurel figured it only had to be done up once, so it was better to use an invisible zip rather than a heavy upholstery zip which would have been highly visible.

After cutting out the fabric for the sunvisors, we installed the zip along the pivot edge (closer to the windscreen) and down the side. This meant that the remainder of the sunvisor fabric could be sewn and then the zipper opening was used to insert the visor.

Laurel used double sided basting tape to temporarily hold the zipper to the fabric and to hold the seams together before sewing. (More on this at the end of this post.)
After inserting the zip the two pieces of fabric were sewn together along their remaining sides leaving an opening for the post to be inserted.
To get the cover to sit flat around the edges, it's important to clip all the convex curves by cutting a number of small 'V's from the seam and the one concave curve just needs to be snipped in a few places. That way the fabric doesn't bunch up on the curves when it's turned inside-out and the concave curve is smooth.

The finished and installed sunvisors. It was quite traumatic cutting the holes in the headlining for the spring part of the sunvisor post to poke through.

...and folded down.

From Laurel:
A note on what was important when sewing this upholstery:
All the upholstery was sewn on my domestic Bernina Aurora 430. When I bought it, everyone told me that a "walking foot" was essential for the job. I had never used one and didn't think it was necessary, but they were right. A walking foot effectively lifts the foot off the fabric between stitches so the top fabric does not move in relation to the bottom fabric while you sew.
The other thing which I only discovered recently (in time for sewing the sunvisors) is double-sided basting tape. This would have made the rest of the upholstery in the car soooo much easier.


Then stick the other piece of fabric to it. Hey presto, they don't move a bit. When you're finished, you just pull the seam allowances apart and pull off the tape. It's truly the most fantastic sewing notion I've ever found. It costs $1.95 for 200 inches and is available in Australia from "Punch With Judy".
Sunday, January 13, 2013
Sunvisors - Fabric Cover
The last of the interior upholstery left to do in the Vogue is Sunvisors. Back in October 2010 I stripped the old sunvisors back to their wire frames, derusted the frames, and rebuilt the core of the sunvisors using the non-crosslinked polyethylene foam from the battery packaging. So now, just over two years later, it's time to finish the job.
Laurel started by marking out the shape of a sunvisor on the back of the same fabric we used for the headliner. The more astute reader will notice that this is the second sunvisor (I didn't take pictures for the first one which you can just see on the right of the picture).

Then she marked a seam allowance and a cutting allowance.

Then pinned the two pieces of fabric together and cut it out.
 Laurel used a 15 inch "invisible zip" along one side to make the job easier/possible. The final result (zip side):
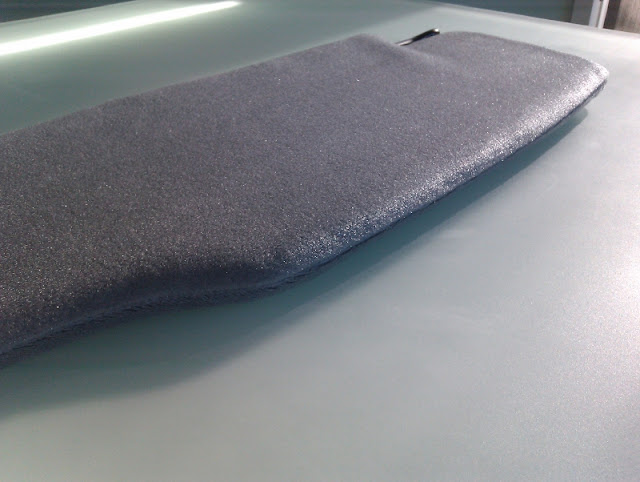
 The non-zip side. This is the side you will usually see.
Laurel started by marking out the shape of a sunvisor on the back of the same fabric we used for the headliner. The more astute reader will notice that this is the second sunvisor (I didn't take pictures for the first one which you can just see on the right of the picture).

Then she marked a seam allowance and a cutting allowance.

Then pinned the two pieces of fabric together and cut it out.


Sunday, January 6, 2013
Brake Light Switch changed and Brakes Bled
This morning, I changed the brake light switch for the one I bought from the UK on eBay (QH- XBLS8). Tammy (daughter) did the foot pumping while we bled the brakes. We flushed about 250ml of brake fluid through the system. Sorry no pics.
I havetwo three major things left to do before getting the engineer out for final inspection.
Meanwhile house renovation is taking a fair bit of time.We're trying to get the bathroom painted before the end of this coming weekend. The heat (weather) may slow us down.
I have
- Install and wire the inertia switch. The wiring is there so all I have to do is drill two holes and terminate the switch connector.
- Mount and test the heater controls. This really means soldering two connections and connecting up the heater flap cable - then two screws to mount the controls.
- Finish and install sunvisors (added 14 Jan 2013).
Meanwhile house renovation is taking a fair bit of time.We're trying to get the bathroom painted before the end of this coming weekend. The heat (weather) may slow us down.
Tuesday, January 1, 2013
The Christmas Break
I took time off from the 21st December to 1st January. I got a little bit of work done on the Vogue but mainly it was stuff around the house - painting bathroom etc. Not much rest I'm afraid.
One of the Vogue's mechanical casualities of the drive to work was the hydraulic brake light switch. When I got home the brake lights were no longer working. The regen. system was turning on the brake lights but the Vogue's original system was not.
This is the culprit - the hydraulic brake light switch.
 I had already ordered one from eBay (a UK seller advertising stuff for Hillman) but Laurel thought I'd be better speeding things up a bit so I bought another one locally. Upon removing the old one - the threads were different. It turns out I need 3/8" UNF, 24 TPI whereas an 1/8" NPT 27 TPI is more common. So I'm waiting for the eBay one to turn up which should be in one or two days. Meanwhile I couldn't be bothered bleeding the brakes when I'm going to open the system up again in a few days - so definitely no EV final inspection yet.
I did fit the polycarbonate boot partition - I'll get a picture soon. Not much to see as the partitiion is clear and it's kind of hard to see. I should have ordered it slightly tinted.
One of the Vogue's mechanical casualities of the drive to work was the hydraulic brake light switch. When I got home the brake lights were no longer working. The regen. system was turning on the brake lights but the Vogue's original system was not.
This is the culprit - the hydraulic brake light switch.

I did fit the polycarbonate boot partition - I'll get a picture soon. Not much to see as the partitiion is clear and it's kind of hard to see. I should have ordered it slightly tinted.
Subscribe to:
Posts (Atom)

