This blog documents the restoration, and conversion, of a 1965 Humber (Singer) Vogue to a fully electric vehicle. The Vogue will be powered by an 11kW(modified), 3 phase industrial AC motor, controlled by an industry standard Variable Speed Drive (VSD) or Inverter. To be able to produce the 400 volts phase to phase the VSD will need about 600 VDC of batteries. A big thanks to the contributors on the AEVA forum: http://forums.aeva.asn.au/forums/

Wednesday, November 28, 2012

Another Battery Pack Check

Following the drive described in my previous post I need to iron out why the packs pulled up a little "short".
I pulled subpack #2 out of the boot, removed the lid,  and measured all the cell pairs. Fifteen of the sixteen cell pairs were between 3.19 and 3.21 VDC. One pair was 2.98 VDC.
I removed those two cells and marked them 11A and 11B (eleventh up from the -ve end of the pack) (the cells are 10AH).
I started by charging them individually at exactly 5A and noting the time and current every now and then. Both cells took 9.45AH - they were obviously quite discharged.
I then discharged the cells individually with a 0.8Ohm load down to 2.9VDC. I got just over 9.5AH. The white LED goes out at about 2.5 volts so lets me use a quick glance while I'm working to help prevent over-discharging the cell.


Obviously both cells are fine.

I recharged the cells to 4AH and placed them back in the pack.
I then charged the pack at 3A. The charger dropped out at 3 hours and 25 minutes. That was 10.25AH. The cells I had removed (#11) were the cause of the charge stopping. They had reached 3.9V and stopped the charge.
All remaining cell pairs were at 3.33 to 3.34VDC. I left the charge current at 170mA overnight - for 7 hours (1.2AH).
Next morning, I loaded cell pair #11 with 0.8 Ohms and kicked the charger back to 3A. It charged for 40 minutes before dropping back from another cell pair getting to 3.9VDC. Most cells pairs were now over 3.5VDC.

That's a total of 13.45AH for most of the cells. The Vogue had indicated 12.19AH which appears to be about 10% out. I will check the current sensor in the Vogue with a measured current, as that is something I have just "believed" - up until now.
I have also heavily integrated (smoothed) the current sensor value in both hardware and software. Perhaps I should not - and just smooth the display value.

Monday, November 26, 2012

Fourth Drive - Proving the Battery Pack

It was always on my radar that I had to test the battery packs beyond the 10AH mark before "trusting" the dashboard range estimation - why? My pack essentially consists of 384 cells arranges as 192 in series and 2 parallel. That means it's a 20AH pack. For the purposes of range estimation I assume a 16AH pack - 80% DOD (Depth of Discharge). If I have any "dud" cells then the packs will only be good for 10AH.
So this Sunday morning I set out to drive the pack to the 12AH mark.

Ready to go - it gets hubcaps and wheel trim when I get the new tyres.

Around and around the big block I went - about a 7 to 7.5km trip per loop - I did 40km starting at 10:30AM and finishing around 11:40AM. The "big block" is a drive I can do that is only ever about 2.5 minutes from home so if a battey alarm goes off I can safely get home without damaging the pack. A couple of times I got brave and went a few km right up to the next major intersection. I passsed guys cutting a slot in the road 5 times.

The result:

After arriving back home I reversed up the drive then opened the bonnet to check temperatures etc. Since I haven't mounted the Lenze LCD/keypad in the cabin yet, I have to use it directly on the controller under the bonnet to check motor temperature and controller heatsink temperature - silly me had turned the car off. I re-started it and to my surprise a battery alert started. There were two subpacks that were alerting - subpack #2 in the boot and subpack #10 UNDER the controller tray! Drat!

I haven't pulled either out yet but I'm hoping it's just dud cells and not an overall metering problem (where I think it's 12AH but it's actually 18 or 20AH).

Other issues:
1. I think I have a tailshaft wobble. It's noticable above 70km/h. That's an axle stand check (initially).
2. Laurel didn't like the driver seat upholstery crinkling. I have pulled the the driver seat out and have stripped back the upholstery to glue it down to the foam a lot more (I was a bit skummy with the glue).

The good? It's a real pleasure to drive. I am absolutely amazed that no-one notices the noise - none. This a 1965 Humber Vogue - it should be noisy! I went within a meter of folk waiting to cross the road several times - and I was the only car for a few tens of meters - and it was pretty quiet - people don't notice.

Another good part is the ventilation in the Vogue is way better than the Super Snipe - it's going to be a better summer car for me (no aircon in either - I haven't driven with aircon for years). The Vogue can direct a huge volume of air into the cabin from the behind-the-bonnet scoop (see first picture in this post).
I had also backed off regen braking to a maximum of about 9kw (15 Amps battery current) and it's probably easier to drive. I'd like a cabin regen-trim control I think.

I'll pull battery pack #2 out tonight and do some tests. That will dictate whether I remove the controller tray to get at pack #10. I've begun re-gluing the driver seat.

Thursday, November 22, 2012

Front Door Liner Progress

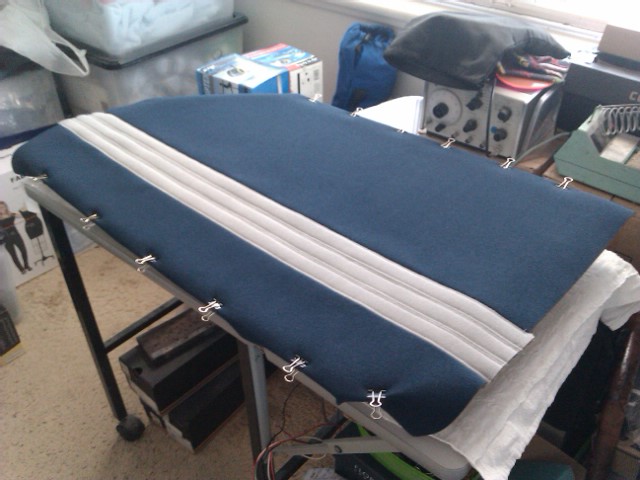
The next stage in door liner manufacture is to trim around the edges allowed 20 to 25mm for the wrap-around gluing. I also cut around the clips to make gluing less messy. The messy holes for door opener and window winder started as beautifully punched holes but look worse for trimming to ensure that the liners fit nicely.

The orange lines are the direction that the clips were placed on the old door liners. That gives me a fighting chance to getting the clips to line up with the car door holes.
Next stage is snip 'V's into the fabric around corners and glue it down with contact adhesive.

The ever useful butterfly clips get used again. My modified surgical scissors are getting near the end of their useful life (unless I sharpen them) and have been invaluable for close-in cutting like the 'V's.

A few minutes after gluing the edges down, I remove the clips 2 or 3 at a time and give the edges a squish to ensure the fabric is secure then put the clips back on.

Thirty minutes to an hour later I do the same and only place a few clips back.

You can see my fancy 'V' cuts clearly in this picture.


Glue dry, clips off - ready for the wood trim and fitting to the car.


Blogspot collects statistics that the blog author can review. I find it interesting that the Feburary 23rd 2012 entry 'Seat Diaphragm Choices' is the most viewed post this week. I hope it helps other Hillman/Humber/Singer restorers out a bit. I'm happy to get comments - even on older posts.

Tuesday, November 20, 2012

Driver Side Front Door Liner

Due to the fact that I can not open the passenger side front door of the Vogue fully due to the way it's parked in the garage, I have started on the driver side door liner. I'll leave the passenger side for the moment.
The clips hold the fabric in the correct place for gluing once I measure exactly where the silver fabric should sit - 405mm to 410mm below the top of the ply. The 6mm foam and fabric are then glued on. I just have to flip it over and glue the edges down - about a two hour job involving lots of fiddly scissor work.

I noticed this picture of the dash in it's woodgrain surround had never been included in the blog.


This picture was taken shortly after the 20km drive around the "big" block.

Thursday, November 15, 2012

Driver side Rear Door Liner Installed

That's both rear doors done.
It was a bit of a pain as the top left clip refused to clip into the door panel. The hole in the panel was on a detachable piece that just bent into the door when pressure was applied. I cut a small peice of wood and wedged it into the door behind the clip hole then dropped it to the bottom of the door and fished it out when the clip was secured.

Next is the front passenger (left) door.

Tuesday, November 13, 2012

Driver side Rear Door liner ready

Things haven't gone to plan in the past couple of weeks. I was hoping to have all the door liners on by now and to have bought the Vogue in to work for it's new tyres (over the road). A bout with a pinched nerve in my back and some family events have slowed things down a bit.

Anyway, the right, rear door liner is ready for the wood trim to go on.

The door has been fitted out so it may get the door liner fitted tonight (unless I'm clipping the rag stealer).


 The rag stealer doing her best to escape William's clutches and be the first dog in the world to be run over by an electric Humber Vogue (during the second drive).