This blog documents the restoration, and conversion, of a 1965 Humber (Singer) Vogue to a fully electric vehicle. The Vogue will be powered by an 11kW(modified), 3 phase industrial AC motor, controlled by an industry standard Variable Speed Drive (VSD) or Inverter. To be able to produce the 400 volts phase to phase the VSD will need about 600 VDC of batteries. A big thanks to the contributors on the AEVA forum: http://forums.aeva.asn.au/forums/

Tuesday, September 18, 2012

Programming the Vogue

The motor controller in the Vogue is made by a German company called Lenze. They offer a free programmer that runs on a PC called Global Drive Control or GDC Easy. It has some limits to functionality, mainly that it can not be used to visualise the entire configuration. There is no limit to what you can actually do - just how you view it. I would LOVE the full blown GDC (Lenze, FCR - anyone?) but it's a tad expensive for a non-factory application like this. GDC also lets you change most parameters without loading the whole configuration so you can play with values quickly and easily and note the results immediately. In many cases you must disable the controller to change a parameters but that means just switching the Forward/Neutral/Reverse switch on the dash to Neutral in my case.

I use Laurel's old Thinkpad T40 for general Vogue programming. I have the dashboard software development system, GDC and a simple serial terminal program on this laptop for recording the dashboard output (if I decide to log a trip). Unfortunately it's battery isn't so healthy (kind of ironic for an EV tool), only being good for about 40-50 minutes so I need to attend to that.

Here, the Vogue is on axle stands while I fiddle with some live parameters.


Monday, September 17, 2012

Rear Passenger Door Liner Installed

I installed most of the clips on the back of the door liner (I left the two centre bottom clips off as it doesn't need them) then cut small nicks in some plastic sheet and attached it to the door liner clips.

Then I assembled the rear door inside handle, lock rods and clips - I am not sure what I would have done if I didn't have a spare door under the house to refer to (I didn't pull the door internals out, the spray painter did so it was a bit of a puzzle which way to re-assemble the top rod).

This is the spare door under the house.


Then it took about 2 hours of fiddling just to get most of the clips to line up with the holes in the door - but it's finally on! We left about seven of the clips off as the 3 ply is a lot stiffer than the original card that Rootes used and it didn't need them - plus it made it a heap easier to get the liner on.
  View from inside the car.
I'm hoping that the remaining three will be easier.

Humber/Hillman Handbrake Improvement

The handbrake on the Hillman/Humber four cylinder 1960s cars has always impressed me as a simple, reliable system - but it has always had a minor problem that annoyed me. Essentially the working end of the handbrake cable ends with a rod to the right hand side and an unsheathed cable to the left hand side. The end of the outer sleeve attaches to the differential housing in a way that allows the cable to pull the rod toward the unsheathed outer sleeve. The problem is that there is inward pressure on the right hand side, ensuring that it is held more than fully off, and the opposite pressure - pulling on the cable side.
Thats means that it is a comprimise between not having the left hand side grabbing but getting enough handbrake action to move the right hand side a fair distance before it engages.

This matters a lot to an EV where the handbrake is all that will hold the car on a hill - no parking pawl.
My initial idea was to place a metal block under the handbrake extension lever on the right hand side - but then I thought of a simpler modification.

First I used a strong lever (big screwdriver) to wedge the right hand side on as far as it would go.

Then I drilled a hole through the lever where it slid through the diff. housing mounting. (Yes this is a setup picture as I had already inserted the split pin - see next picture).

Then I slid on washers to adjust, and finally inserted a split pin to hold the rod out enough so there was only a small amount of slack.

Now it is possible to take out a lot of the slack in the cable resulting in a shorter stroke of the actual handbrake handle. I took a lot of that slack out following taking this picture. (I know - that diff. housing needs a coat of paint - maybe when I stop jacking it up every second day...)

Friday, September 14, 2012

Speedo Cluster Software Updated

Last night, I did my first software update of the Speedo cluster since it has been in the car.
It was a tiny bit stressful as the programmer I use also erases the boot code in the PIC (uProcessor) so there is a window of time where if something goes wrong, or if I make a mistake, the speedo is "bricked". That would require having to pull the whole lot out to be able to get at the emulator connector on the circuit board inside the speedo housing - lots of work. (I bricked the speedo a number of times during it's software development so it's not beyond me to "get it wrong".) It all went well.
 
The update came about following the speedometer inaccuracy mentioned a couple of posts ago. Woody from the AEVA forums sent me this extra gem of information about tyres.
http://www.carbibles.com/tyre_bible_pg4.html#slr

Another website I found also supported this although it results in slightly different figures.

TRC Calculator
(Link fixed)


The combination of different differential ratio and the 0.96 rolling curcumference correction (from the above articles) completely explains the 67km/h vs 60km/h error - although I'm still perplexed at why anyone would have changed the diff in the first place.

So I have altered the ODO and Trip meter calculations to use the 0.96 compensation but left the speed calculation about 3% high - just by not applying this compensation. It also appears (from the second web link) that the static and dynamic rolling curcumference can change. It moves back to about 0.97 at 60km/h and probably changes more at higher speed - getting closer to calculated value. This of course depends on initial tyre inflation. I don't think I'll go that far but I will measure the static circumference of the Hancook Enfren LRR tyres when I get them using a driveway/chalk rolling test.

Rear Door Liner ready for Installation

I finished gluing the fabric to the rear door liner last night.
We choose to have three 34mm strips of silver, pieced and top stitched. It took of lot of family advice to decide where to place the silver. The top part ends about 20mm under the lowest part of the armrest.

A minor mistake is that I should have inserted the 20 clips first. They go in from behind so that's not a problem but it would have been easier to place them in the correct position for the holes in the door without the fabric on the door liner.

Wednesday, September 12, 2012

Speedo Inaccuracy Explained (mostly)

The tyres I plan on using are 185/65R13. With the Vogue's 3.89:1 differential ratio, that works out to be 41.48km/h at 1500 RPM. In the speedo software I divide motor RPM by 36 (41.67 from 1500 RPM) and round up to the nearest integer so it should show 42km/h.
I placed the Vogue on axle stands last light and locked the controller's maximum motor speed to 1500 RPM.

I set the PC to monitor various controller variables including actual motor RPM.
Flooring the accelerator gave me 1499.9 RPM on the PC monitor and 42km/h on the speedo in the car.

So all the calibration and calculations are actually correct - so why does it show 67km/h when we are doing 60km/h?

About the only thing left is the diff ratio - but that can't be wrong - can it?
Historically, the Mk3 Vogue sedan was shipped with a 3.89:1 diff. The earlier Mk2 has a 4.22:1 then later in the run changed to 3.89:1 - or so the rumors say.

The 3.89 to 4.22 would make about an 8% difference to speedo ready. My 67 to 60 is around 10 to 11% - but it's close. The current tyres on the car are 175/70R13 which are ever-so-slightly larger than the ones I calibrated for but it's not much (this should slightly counter the different diff.).

Back to diff. ratio. When I bought the Vogue it had been built from three donor cars. We know one of them was a Vogue Sports because I have the boot lid and badge, BUT, the Humber Vogue Sports never shipped as a Mk3 in Australia, so the boot lid is from a Mk2 - might the diff. be as well?
(The Sports did not sell as a Humber in Australia because all Mk3 Humber Vogues were upgraded to the Sports Alloy Head Rapier spec. motor - no need for a Sports.)

I'm very happy with a 4.22:1 final drive ratio - I had even considered chasing one up so that's good.
So a speedo software change is in the works.

Tuesday, September 11, 2012

Door Liners - last of the major work on Interior

Laurel sewed up the fabric for a door liner on Sunday so I bought some light-weight 6mm foam and, last night, glued it to the rear passenger side door liner. I left about 12mm at the edge with no foam. I also did not place foam under where the wood trim goes at the top.


I left it for a little while then lightly glued the fabric to the foam.

This is the first one so it's a bit experimental. I am not sure I used enough of the spray on glue. I'll see tonight. I don't want the fabric billowing out when I wrap it around and glue it (contact adhesive this time) to the other side of the panel.

Monday, September 10, 2012

Another "Spin" in the Vogue

I drained and re-filled the differential housing on Sunday morning. It wasn't as empty as I feared but when I stuck my pinky in the filler hole it came out with very black oil on it - so I drained it.
After re-filling the diff, I ran the car on axle stands and over the first 30 seconds or so everything quietened down noticably. I hope there is not any long-term damage.

On Sunday afternoon I put a new configuration in the controller - this one has regen and battery-alert-regen-cutout only if you are de-accelerating when the alert goes off. Whoops - no regen. again. I removed one function block - one that stops regen under 1.4km/h, and regen. was back. That was fine, the block was only to conserve power when stopped at lights etc and I can just turn it to neutral.

So William and I grabbed our phones, the Lenze manual and a User Input Keypad/display (stlll not mounted in the cabin but I can plug it into the controller if I have to), and set out. The "trip" was around the very large block formed by four major roads  - about an 8km square. We would never be more than couple of minutes from home (centre of big block) should be get a low voltage alert. The Headways (batteries) give me about 2 minutes of power once I get the alert before I damage any cells.

At the start of the trip we had 1km on the trip meter and 54km range. I hadn't charged it since the 1km trip last weekend. After the first couple of kilometers we felt a bit more confident - regen braking was great and I didn't need the brake pedal except when stopped on a hill. At about the 3km mark the range had dropped to 49km - not good. We kept going and at the end of the hill down one side of the square we were back up to 54km - great. I hadn't touched the brake pedal yet - all our stopping was happening on regen braking. Generally I was getting about 15 Amps into the pack at about 50km/h. Regen worked all the way down to stop with one minor problem - the Vogue always wanted to go BACKWARDS about a meter once we had stopped. Gently holding the acccelerator down a bit stopped this tendency and I turned the enable off (neutral) each time we had to stop for more than a few seconds. I need that function block after all!

On the first leg we stopped at a service station and put 32psi into all tyres. The service station queue to the bowsers was quite long but we ignored it.

We went around about 2 1/2 times then cut through the middle sides streets to visit a relative who lives nearby, then home.

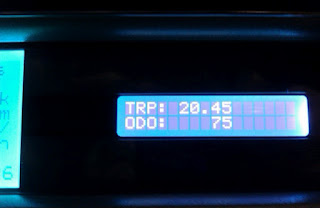
Here are the dash board pictures once we were back in the garage.


The pictures tell it all (almost). I am amazed at the economy given one leg of the square travel speed is 70 to 80km/h. Our range on arriving home was similar after 20km to the value when we left. I attribute this to better tyre pressure - they have been 25psi for previous drives, surface rust on front brake rotors and rear drums finally getting a chance to be rubbed off, and a differential housing with the right quantity of oil in it. It could also be that this was the first drive under normal circumstances and at reasonable speeds. (Of course I could have a massive conceptual bug in the range estimation as well!)
(Later addition. I realised that the real reason for the improved range after this drive was that I "*fanged" it around the block the previous weekend for that one kilometer, with no regen, so the range estimate started out rather pessimistic at the start of our 20km drive.)
*Vogue version of fanged at the moment is still rather tame.

Problems.
  1. The car is noisy. Suspension squeaks and maybe the front wheel bearings need a clean and re-packing.
  2. The speedo and perhaps trip/ODO are inaccurate. The display reads 67km/h when our GPS says 60km/h - so about 10%. Expensive signal generators and frequency meters and still I mucked up. The tyres on the car vs the ones the speedo cluster was calibrated for should have the error the other way. The tyres currently on the car are larger.
  3. I still have a small "thump" on the transition from regen to accelerate.

Minor problems aside, I was extremely happy with the drive and more than happy with wh/km - even with the 10% error. (About 132 wh/km battery to wheel.)

Tuesday, September 4, 2012

Electric Car Music Video

This is twee but I like it anyway.

I Have Regenerative Braking

Some help from AEVA members and regen. braking is now working (emoticon with red face). The Vogue is still on axle stands but a quick test this morning showed power going back into the batteries and the rear wheels coming to a pretty quick stop when I lifted my foot off the accelerator pedal - no thump either. I had to allow torque to go negative for regen. I went to a lot of trouble to NOT let that happen - picturing a ride on lawnmover with forward/reverse control on the one pedal.

I have kind of come to the conclusion that the differential probably has no oil in it. I don't mean low - I mean none. The car sat in the back yard for about 6 years, then 3 years getting restored and electrofied - and I know the diff leaks, and not just the seals, I think it leaks out a faulty seal in the drain plug as well....
The rumble of gears running in a hollow diff housing is unmistakable (this only became obvious when running the car in the garage on axle stands). Fortunately I haven't driven the car very far in the last decade - since I checked the diff oil. I won't be running it again until I fill it. I have to pull the rear axles at some stage in the next year so I won't go overboard at this stage - I'll just fill it.