This blog documents the restoration, and conversion, of a 1965 Humber (Singer) Vogue to a fully electric vehicle. The Vogue will be powered by an 11kW(modified), 3 phase industrial AC motor, controlled by an industry standard Variable Speed Drive (VSD) or Inverter. To be able to produce the 400 volts phase to phase the VSD will need about 600 VDC of batteries. A big thanks to the contributors on the AEVA forum: http://forums.aeva.asn.au/forums/

Thursday, February 23, 2012

Seat Diaphragm Choices

The Vogue seat diaphragm measures 410mm by 465mm. The holes in the seat frame are about 460mm apart front to back, and 510mm apart left to right. The Vogue seat appears to be unusual in that it is wider than it is deep. Same depth as most seats but a lot wider. Hillman (Minx, Gazelle) seats of the same era are identical.
Here's a reminder look at the Vogue seat base.
Here is one of the MGB seat diaphragms that I allready have. It measures 330mm by 430mm.
Here is one sold by a Sunbeam place in the USA for the Sunbeam Alpine. It's almost the same dimensions as the MGB one.

Finally (for now) here is one for the Triumph TR6. It measures about 330mm by 365mm. Coincidently the place that sells them is only about 6km from where I live.
The MGB and Alpine diaphragms are just too narrow.
So the TR6 diaphragm looks like the best contender.
I figure if I cut four pieces of 40mm by 3mm flat aluminium and drill holes for the TR6 links, then drill holes that line up with the 12 Vogue links down the other side (and use the old Vogue links), I would get a nice fit. The 40mm flat would stop the seat foam falling down where the rubber diaphragm doesn't fill the gaps between it and the seat frame.

For the back of the seat (I was going to use the old rubber but have read too many recommendations to always replace the rubber) I was thinking of using webbing straps.

I figure six pieces of 50mm wide seat upholstery elastic webbing. They call this Premium grade. I have sent an email asking how long it would last in the environment of a car. If I don't use this then maybe seatbelt webbing but then I would have to use tension springs instead of the wire link thingys.

Clamp the webbing ends (with the clamps pictured below) then drill a single hole through the clamp for the link.

(Last picture is from http://www.diyupholsterysupplies.com.au/ Thanks Vincent for pointing me at this site.)

Tuesday, February 21, 2012

UK Bailey channel no good

The Bailey channel from the UK is 14mm - no good.
I have sent the windscreen seal back and expect a replacement in about a week.
That means no windscreen by the end of February. Oh well - lots to do on other bits.
I've tracked down a flexible bailey channel replacement for the Mk1 Ford Cortina that might fit.
Curiously, Clark Rubber stock it so I might get 50mm to try.
More soon.

Monday, February 20, 2012

A Frustrating weekend.

It's been a frustrating weekend.
I decided to leave the rear 1/4 light windows alone for a couple of days while I sought advice and decided to finished the doors - install locks, glass etc.
I had already restored the door lock mechanisms and purchased bailey channel and weatherstrips over a year ago. (Bailey channel is the channel that the winding door windows slide up and down within.)

First step was installing the door locks.

Before
After

The doors close and open very nicely. No door seal yet but that's for another day.

Next, measure up the bailey channel and get ready to cut it. I kept all the old stuff and and the length isn't critical as half the channel is hidden in the door, but I needed to know how much room they took up so I could get the weatherstrip and felt strip that goes accross the door (where the glass dissapear into the door) measured accurately.
Since the bailey channel has been cut with tinsnips I had to clean the ends anyway so I hacksawed off (small fine blade) about 50mm of channel.

First thing is noted is that it did not appear to be wide enough for the part of the door where it was to be installed.
Rear Vogue door showing where the bailey channel fits.

Careful measurement showed my new bailey channel to be 15mm wide. The Vogue requires 5/8" which is 15.875mm. Believe is or not the difference is make or break.

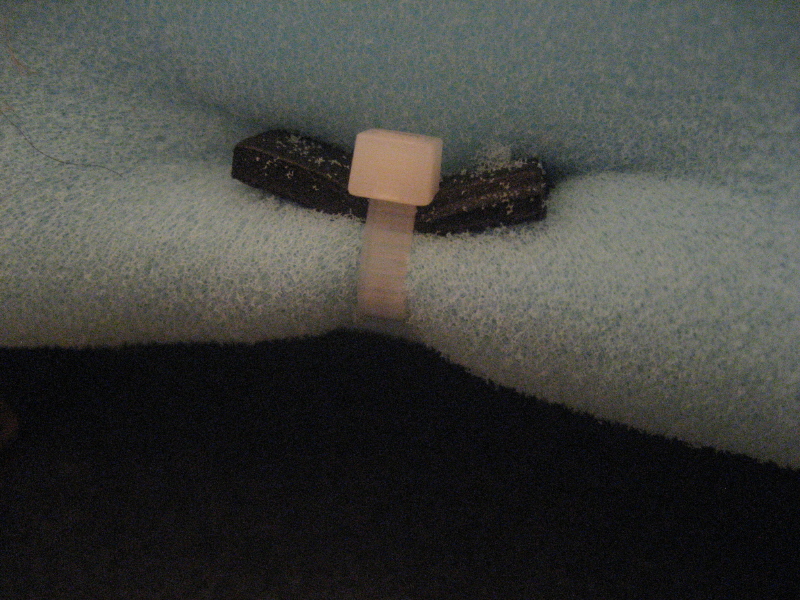
New and old bailey channel.
Picture to be added later - when I find it (found it 2nd March 2012)!

I could kind put up with that, so I checked my 50mm piece on the Vogue doorglass (why didn't I do this a year ago?). Nope, that didn't fit either. The channel is apparently for 1/4" glass - the Vogue uses 3/16" glass. All in all, useless.
Looking up online revealed that I appear to have Holden EH bailey channel. Described as 15mm wide, 15mm high with a stainless steel bead on either side.

The Vogue originally has 5/8" wide, 3/8" high on one side and 1/2" high with a stainless steel bead on that side (outside). It appears to be the only car in the world that has 5/8" bailey with 3/16" glass.


Since I have not been able to find 5/8" bailey with 3/16" glass in Australia I checked the same place in the UK that I got the Vogue doorseal and carpets from - yes they list it. They are emailing me today with the actual sizes.


OK, forget the doors for now. How about the windscreen rubber. We have had a new one for a week or so but hadn't fitted it to the screen. Short version of story. There is no way we could get it on the windscreen glass. The packaging did say 61-64 Vogue/Super Minx but I thought that since we had (me and vendor) discusses the fact that the 1965 has a bigger screen, AND the seal was made for me, it would be corrent. I have emailed him too!
Curiously Alpine West Midlands (provider of Vogue carpet, doorseal, probably bailey channel and now windscreen seal) list one and they have already verified that it takes the stainless steel trim and is for a Mk3 and Mk4 Vogue. I think I'll just buy the third windscreen seal. I'll have a lot for eBay when this is done!

OK, forget the windscreen (Sunday afternoon by now), let's do the front passenger seat. I had stripped it and painted the frame a couple of weeks ago.
I reinforced part of the seat base that had bent slightly and reassembled the base. (A piece of aluminium pop riveted at either end in a pool of epoxy.)

The reinforced part of the seat frame (right).The aluminium is 10mm x 3mm and 250mm long with 1/8" holes in about 20mm from the ends (documented here so I don't forget for the other seat).

Then I got out the MGB seat diaphragms that I bought 2 years ago (having been told they were a pretty close match to Hillman ones), and no way will they fit. I think they would be a disaster even if I did make them fit.


The old seat diaphragm (below). I circled the torn bit - repairable I think.

So three options that I can see:
1. Make the MGB seat diaphragms fit
2. Use webbing and springs
3. Fix the old ones they are torn in one place (center back).

Not a great weekend for the Vogue...

Wednesday, February 15, 2012

Rear 1/4 Light Window Installation - NOT!

I have trimmed back the headlining all around the car in readiness for installing the pinchweld around the doors and the rear 1/4 light triangular windows (behind the rear doors).
We attempted to install one of the rear 1/4 light windows last night but unfortunaetly - failed.
No matter how much soapy water and pulling and grunting we did, it just would not go in around the corners.
We are using the cord around the seal inner lip and drawing it in from the inside of the car.

This is the opening where the window has to go.

Here is the window - complete with rubber seal and bit of cord.

The first time we tried with the cord all the way around the window rubber.
We tried cutting the cord into three lengths and:
1. Running it from corner to corner.
2. Running it from the middle of each side, around a corner, to the middle of the next side.

We haven't caused any damage yet but I am concerned about the headlining if we try this too many times.
I think we will try with a slightly lighter cord - the one we used was thicker than the one we used for the rear windscreen as we thought that we were lucky not the tear it at the time.

The seal is on the large side as it was very easy to get onto the glass. I'll slip the seal off and check for fit in the opening before we try again.

Wednesday, February 8, 2012

Trimming Headlining

Since my new windscreen seal and rear 1/4 light window seals have arrived it's time to finish trimming the headling.


I didn't have scissors that fitted very well into the places I needed to cut - so I bought these on eBay. They are Medical Dressing scissors.


A vice and big pair of multigrips and they became this:


I also carefully took the point off  the "pointy" bit so it was more difficult to scrape paint.


They were then used to do bits like this.


Less useful here but still better than straight ones.

Rear Seat Base Foam Done

I managed to get some time last night to finish the foam padding on the rear seat base.
Now the whole rear seat is ready to put the fabric on.
(Added 26/02/2014) My sketches for the rear seat foam that show some of my thinking.

Tuesday, February 7, 2012

Windscreen Seal Arrived

My new windscreen seal was on the doorstep when I got home last night.
The weekend should see the Vogue with a windscreen.

Monday, February 6, 2012

Rear Seat Foam Padding

I have finished padding the upright (back) of the rear seat. We were under the impression that this job would be easy once the fabric parts were done - not so. There were lots of places where the strength of Vinyl made life easy for the padderers(???). With fabric we can't put too much stress on it so the foam padding has be be secured before the fabric goes on. We also discovered that there was additional 8mm padding sewn into the vinyl around the areas that were more padded. This created a "plush" effect of rounded padding.
You can see the effect in my previous post about the front seat.

Even had we known about the sewn-in padding, it would have been very difficult and maybe not even possible to do with the sewing machine in use. (We are using upholstery thread and the sewing machine is coping but there is not much reserve.)

The rear seat-back before stripping.
I then removed the vinyl and foam. I left the heshing in place that covered the wire springs but spent some time ensuring the springs would not poke anyone in the back. Also some derusting and rust prevention.


This is the back of the rear seat upright part (shown above).
Note the method of holding the vinyl in place in this 'before' picture. They had some kind of wire tool that stapled through the vinyl or foam.


First we covered the whole back of the seat with 10mm "firm" foam (blue). Yes those are the same clips that held the headlining during glueing.
 In place of the wire staple type gizmo used originally, I used cable ties with cut pieces of shoe insole (new) to support the foam.
We tried square cut 20mm foam for the extra padding but it was obvious when we stretched the fabric over it - too flat!
So we had to come up with "plush" cushioning. We tried "shaping" 20mm foam with the electric kitchen knife and ending up with a raggity edge. The idea was that we would then place 6mm foam over that to smooth it out.
The result - no good! The 6mm foam over the top of the 20mm helped (not shown) but it was getting too bulky.
It got very complicated until someone came up with this idea.
We glued 10mm foam onto the base foam, cut in such a way as to leave 40mm either side where we want padding. Then we place 10mm foam over that in a bridge-like fashion. The second lot of foam is only glued for about 10-15mm along both edges. (The demo bridge piece isn't supposed to be there.)

The base of the rear seat has 35mm thick foam which originally poked out past the frame by about 60mm. The vinyl wrapped down around the foam and held it in position.

We can't do that with the fabric, so the 35mm foam now only protudes about 5mm past the edge of the frame and we have glued 20mm foam to the edge of the 35mm foam.
I will use the same approach that we used on the back of the seat for the 'plush' padding on the seat base.

The base of the rear seat frame before painting.

Foam for front seats waiting patiently in our bedroom.
And the rag stealer finds another new bed. Apparently she gets up there when she thinks no-one is looking.